Tutorial 3: Terrain Maps
In this tutorial, you’ll create a program that generates and renders a terrain height map from the output of a noise module.
Unlike the original pynoise, the functions of its noiseutils are built into pynoise, so that you will be able to immediately output useful terrain maps without anything extra.
Creating the terrain height map.
As in previous tutorials we will create a Perlin noise source:
from pynoise.noisemodule import Perlin

perlin = Perlin()
Now we can create a noisemap from this noise source. A noise map is a 2D array of noise value from a given source, which can be used in games or put into images.:
from pynoise.noisemodule import Perlin
from pynoise.noiseutil import noise_map_plane

perlin = Perlin()
noisemap = noise_map_plane(width=256, height=256, lower_x=2, upper_x=6, lower_z=1, upper_z=5, source=perlin)
Note
Appending _gpu to the end of noise_map_plane will enable the gpu acceleration built into pynoise. In many case this will result in dramatic speed increases.
Running this however will not do anything, as you’re building a noisemap and then throwing it away. We need two more things to render some noise: a color scheme (called a gradient in pynoise) and a renderer.
Add these lines below from pynoise.noiseutil ...:
from pynoise.noiseutil import terrain_gradient
from pynoise.noiseutil import RenderImage
And add these lines below noisemap = ...:
gradient = terrain_gradient()
render = RenderImage()
render.render(256, 256, noisemap, 'terrain.png', gradient)
Running this will now output the below image:
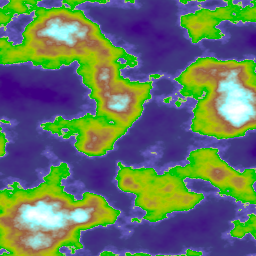
Pretty neat? The image renderer comes with a variety of different options for lighting such as intensity, color and direction.
if we change:
render = RenderImage()
to:
render = RenderImage(light_enabled=True)
we now get:
This brings out some of the detail, but it’s still rather boring, so lets increase the contrast a bit. We do this by passing the light_contrast variable into RenderImage:
render = RenderImage(light_enabled=True, light_contrast=3)
and now we get:

Which shows even more detail, but it’s pretty dark (darker than our original without lighting even), so lets increase the brightness a bit, with the variable light_brightness:
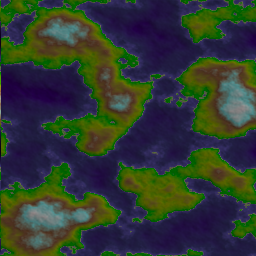
render = RenderImage(light_enabled=True, light_contrast=3, light_brightness=2)
which results in:
which is much brighter, and now we have lots of detail showing.
Tiling terrain height maps
This biggest advantage of using coherent noise is that you don’t have to generate everything. You can generate subsections of a map, as you need them, and they will stitch together seamlessly.
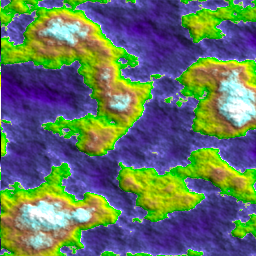
Here we can shift to the left, and show the previous step next to the shifted one, and you’ll see that they combine together seamlessly
replace your noisemap with:
noisemap = noise_map_plane(256, 256, 6, 10, 1, 5, perlin)
and view them side by side and you’ll see:
